Activate Online Payment
In this guide, we’ll walk you through the steps required to enable payment gateway functionality and set up Stripe on your merchant website. By the end, you’ll be equipped with the knowledge to seamlessly accept payments for orders placed through your customer app, enhancing both your revenue stream and customer experience. Let’s dive in.
1) Enable or disable an online payment method via the toggle on top right corner of a Payment gateway (e.g. Stripe)
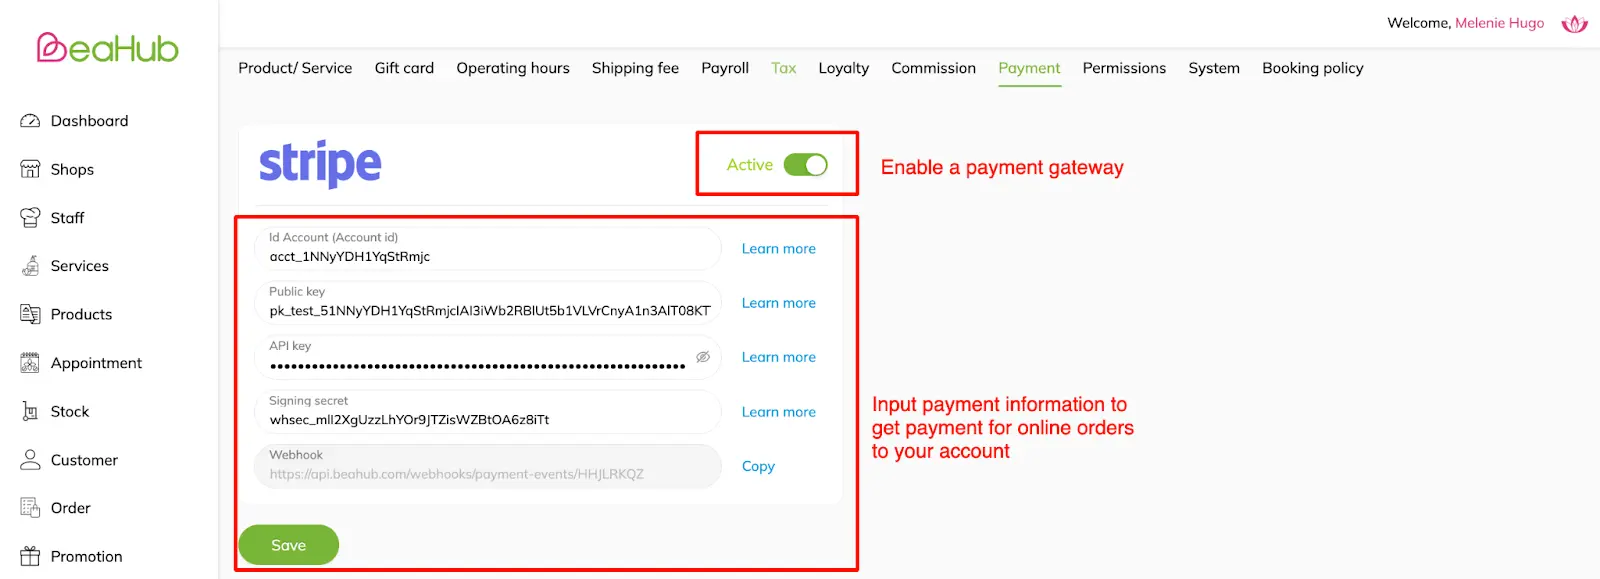
2) Login into the merchant’s payment gateway account (Stripe account) to get essential information and fill in according payment gateway section:
a) Get Stripe account ID at Stripe – Settings – Profile – Accounts: https://dashboard.stripe.com/settings/user
b) Get Stripe publish key & API key at Developers – API keys
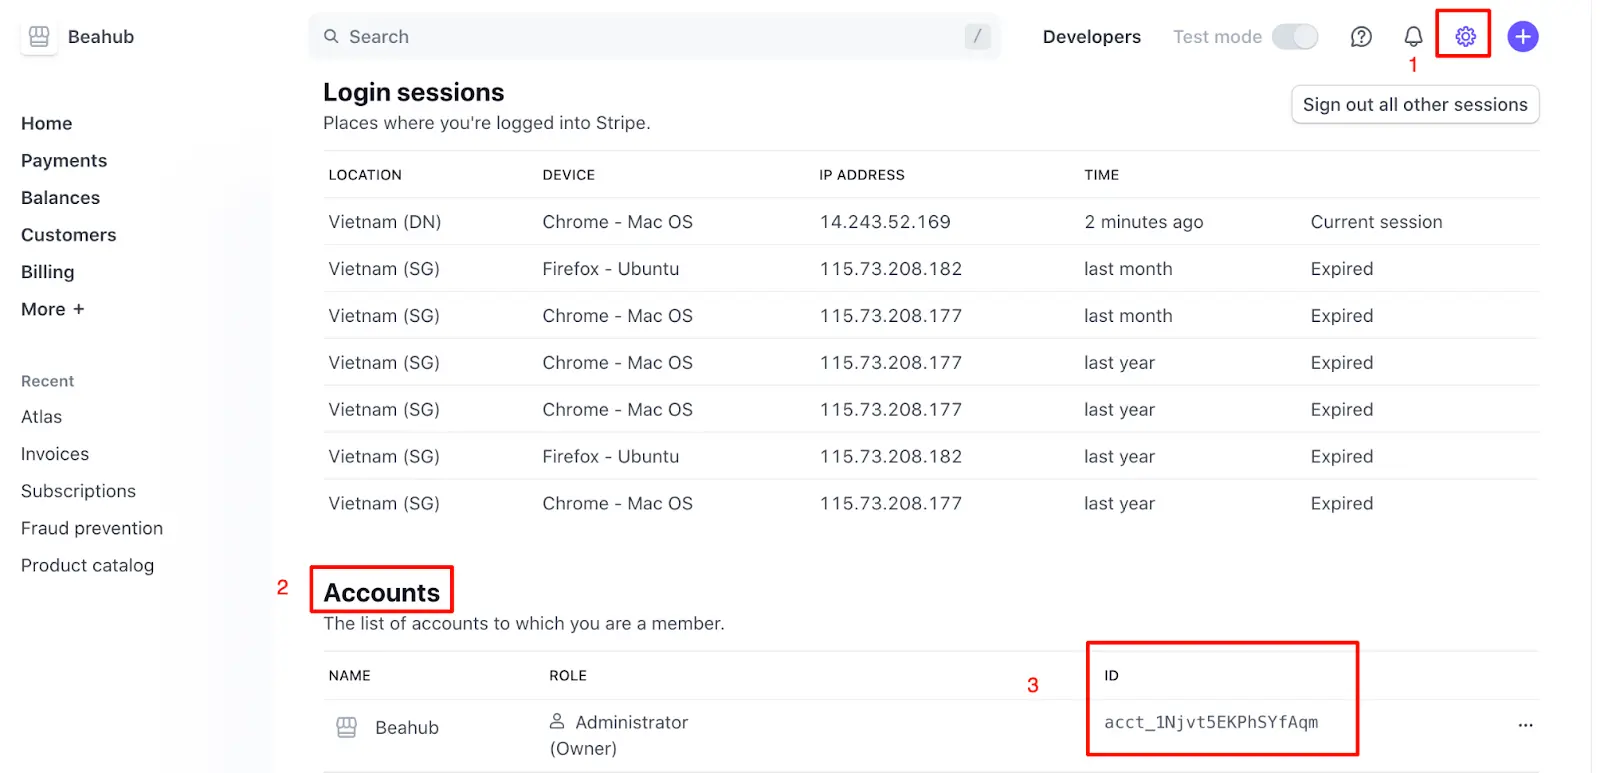
Stripe’s Account ID: Settings (Profile) > Accounts > ID
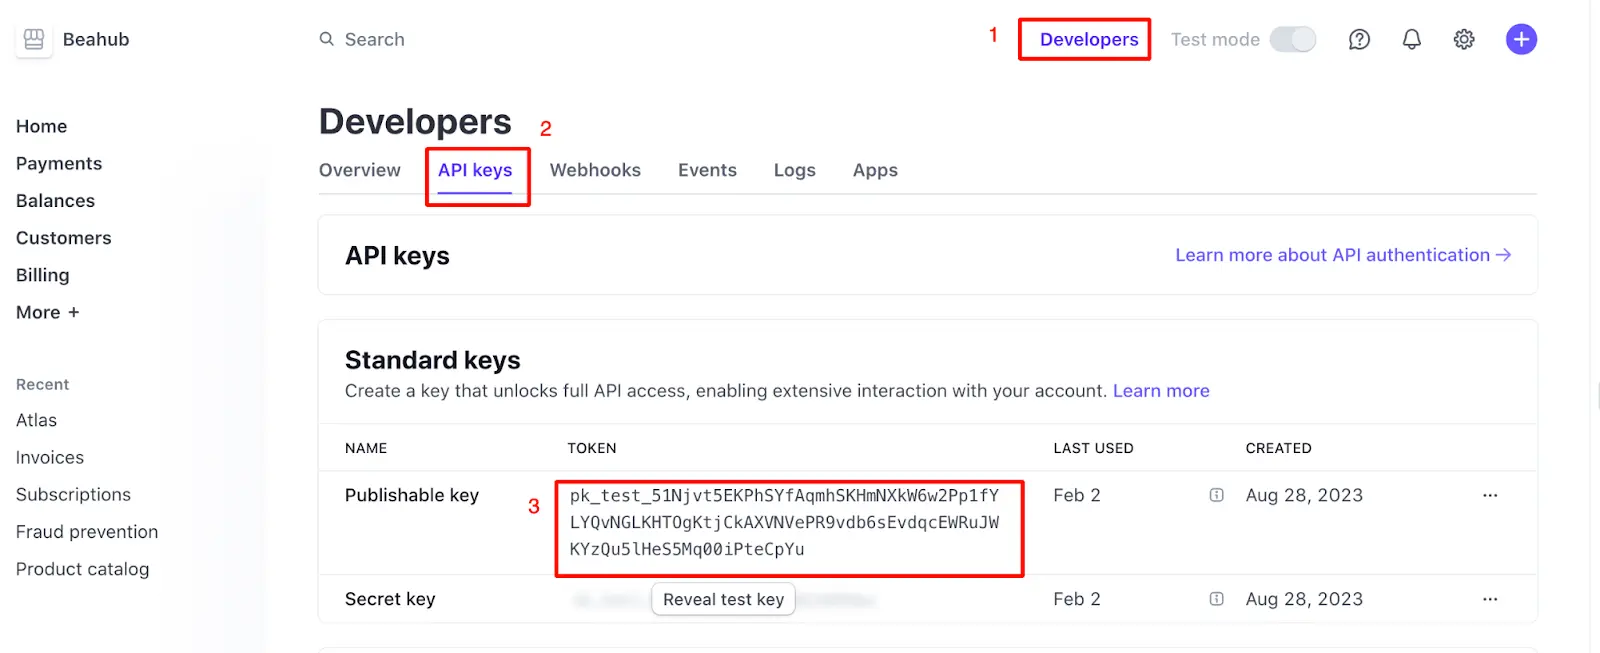
Stripe’s Publishable key: Developers > API keys > Standard keys – Publishable key
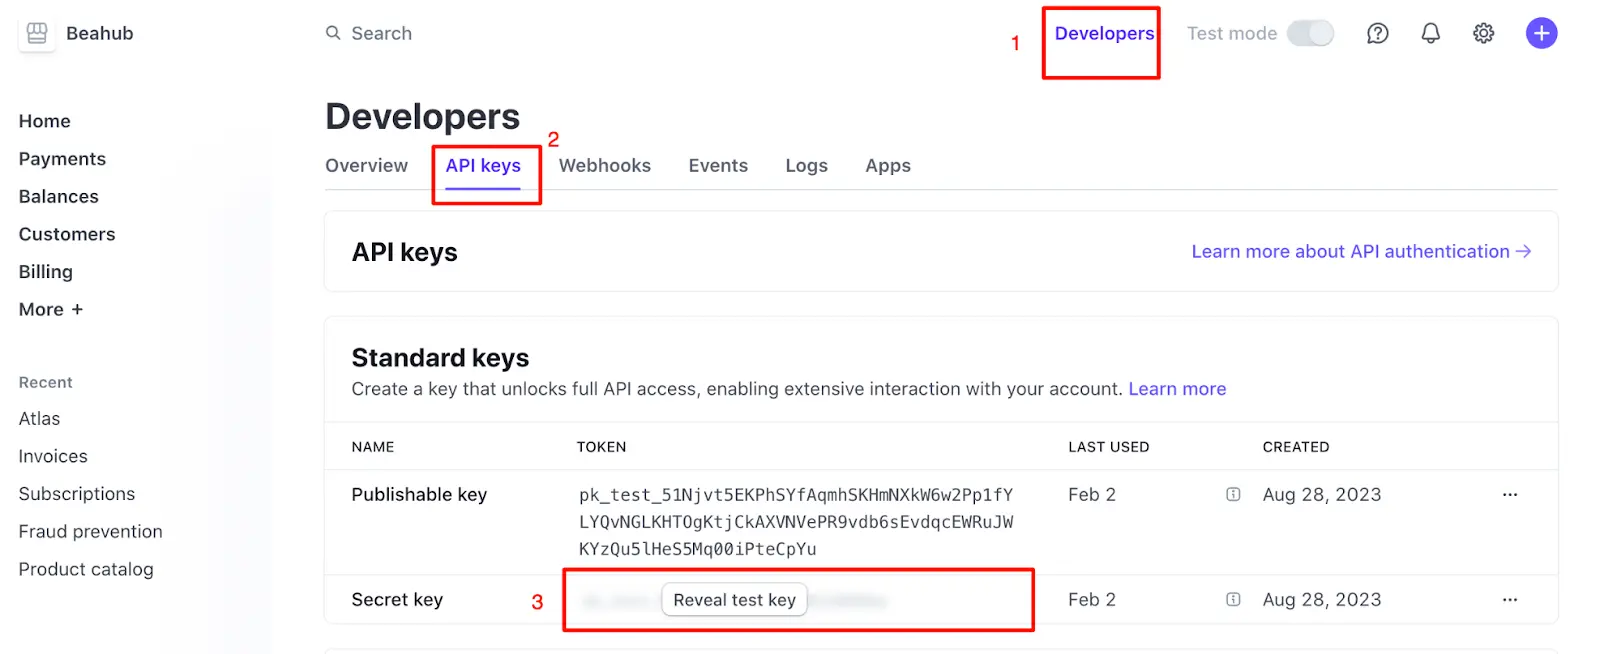
Stripe’s Publishable key: Developers > API keys > Standard keys – Secret key > Reveal key
c) Get Signing secret followed the provided webhook endpoint on Payment gateway section
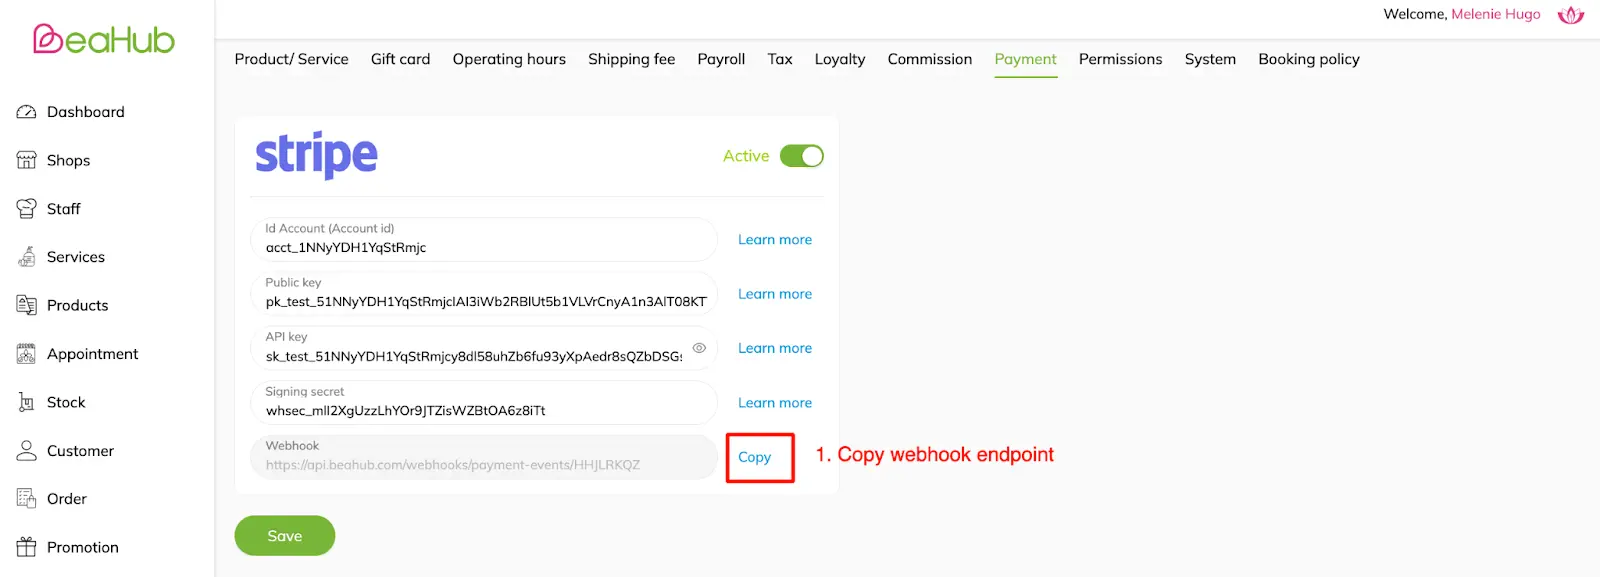
Stripe’s signing secret: (1) Copy webhook endpoint on merchant website
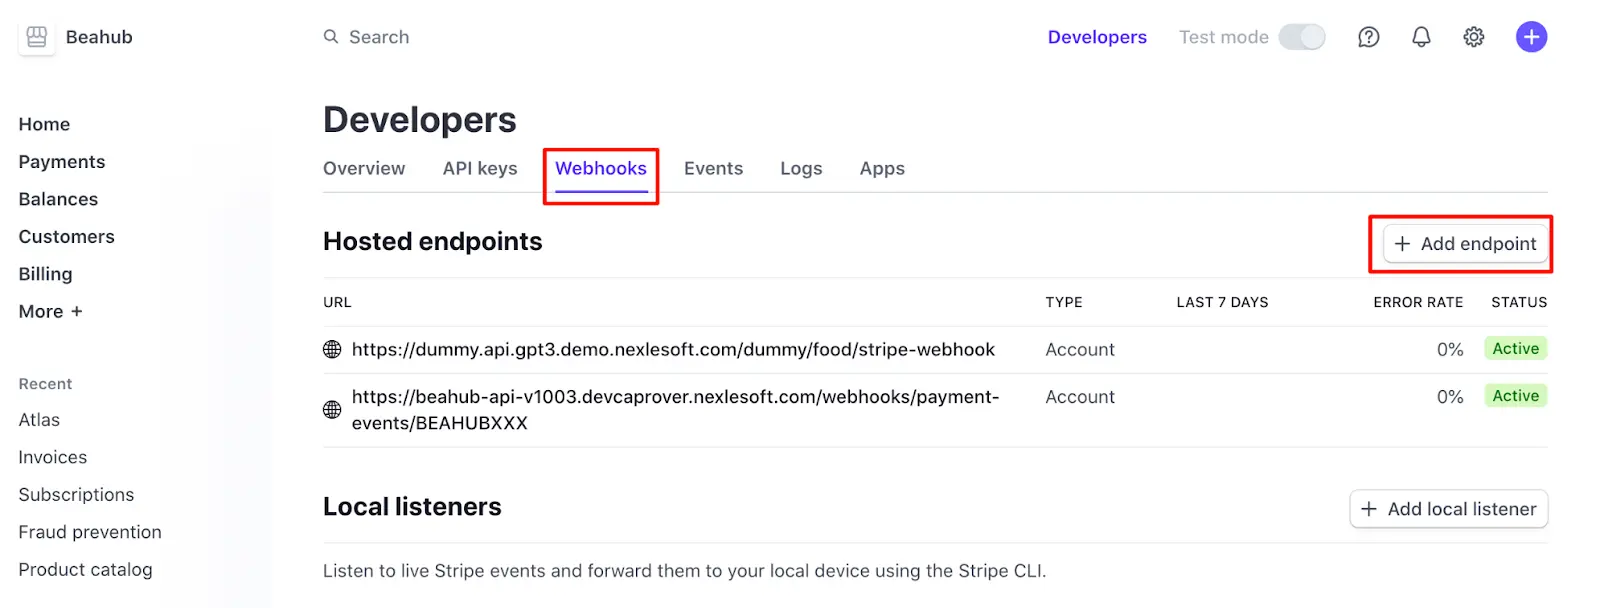
Stripe’s signing secret: (2) Add endpoint to your Stripe account at Developers – Webhooks tab

Stripe’s signing secret: (3) Add endpoint
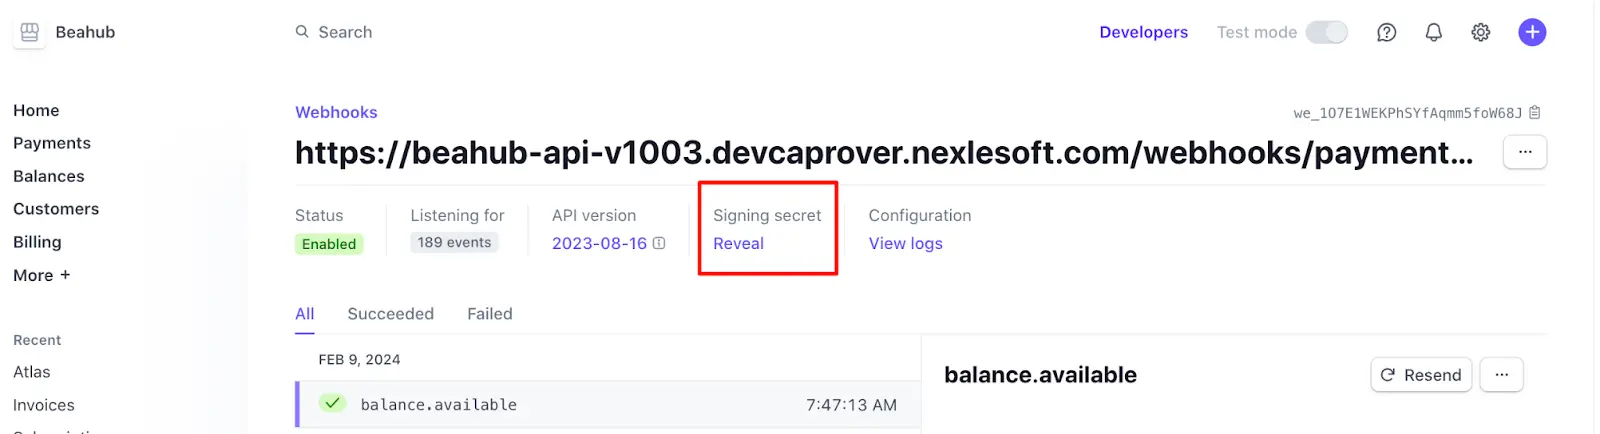
Stripe’s signing secret: (4) Click the created endpoint > Reveal signing secret
3) Click Save